
Previously I wrote about hosting my own WordPress on AWS (here), which uses EC2 and RDS. With Free Tier, that architecture did not cost a cent. But as Free Tier draws closer to an end, the EC2 + RDS architecture would cost approximately $20+ USD a month, which was way too expensive. Migrating the RDS MySQL into a EC2 (t2 nano) could reduce the cost to around $5+ USD a month (excluding data transfer cost), but I wanted to reduce the cost even more.
I started with what I want to achieve:
- Cheap (less than $5 USD/month)
- Easy to set up with minimal customization
- Hosted on AWS
Serverless WordPress?
First solution that came to my mind was Serverless. After doing a little bit of digging around the Internet, I quickly realised that it would be easy setting up and maintaining a Serverless WordPress. Additionally, dynamic WordPress functions such as comments or widgets will be difficult to set up when the WordPress front-end is static. Francesco Carlucci sums up the challenges quite aptly here.
Serverless does not meet my requirement of it being “easy to set up with minimal customization”.
Introducing Amazon Lightsail
Amazon Lightsail page wrote: “Lightsail is an easy-to-use cloud platform that offers you everything needed to build an application or website, plus a cost-effective, monthly plan.” with “Plans starting at $3.50 per month”. Let us take a look at what Lightsail offers.
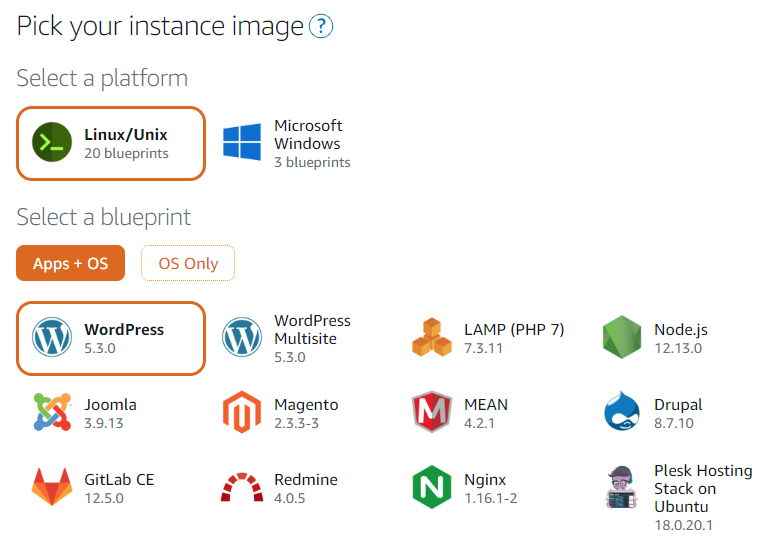
WordPress stack out of the box? Does it really cost $3.50 USD a month? Let us check.
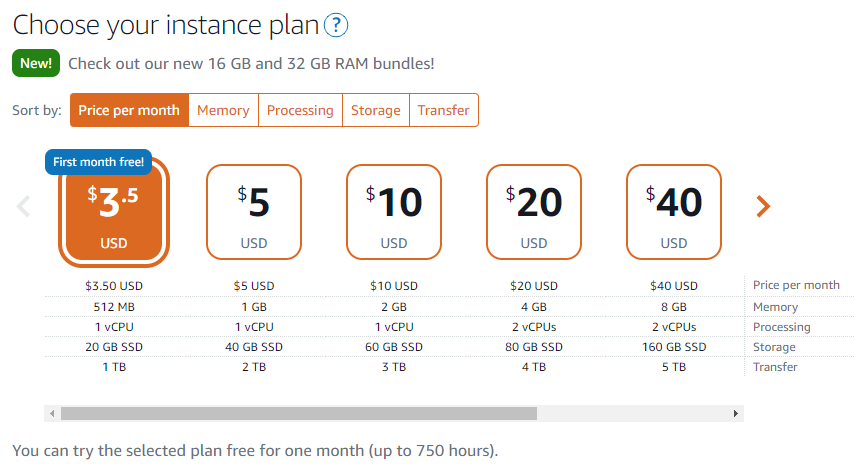
A t2 nano EC2 sizing, with 1 TB of data transfer, for $3.50 USD?! How is that possible? An equivalent set up with 1 TB of data transfer would cost more than $90 USD on EC2! Even with Reserved Instances or Savings Plan, there is no way a similar set up on EC2 is cheaper.
Lightsail meets all my requirements of being cheap and easy to set up.
Migrating WordPress to Lightsail
To be honest, it was really easy to migrate my existing WordPress by following this Lightsail documentation step-by-step. If you want to set up a new WordPress server on Lightsail, you should follow this instead.
Static IP address
After completing the steps in the documentation, there are still a few things to do. With your newly spun-up WordPress, you are assigned a floating IP address by AWS. A floating IP address is an AWS-owned IP address that will change everytime you stop and restart the instance. To solve this problem, you need a static IP address.
In EC2, static IP address, also known as Elastic IP (EIP) address, is free-of-charge if you attach it to something such as a Elastic Load Balancer or an EC2 instance. There is a soft account limit of 5 EIPs, which should be the same on Lightsail.
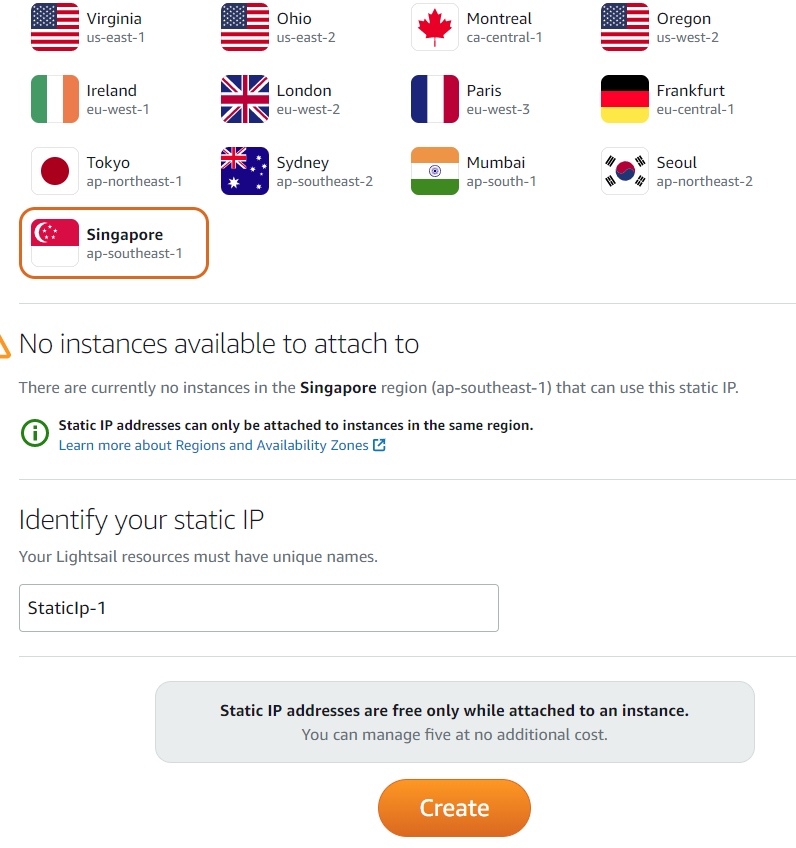
Once again, follow the official Lightsail guide on creating a static IP and attaching it to your WordPress instance on Lightsail.
If you have a Route53-registered domain name, continue reading my next section. If not, feel free to skip to the end.
Route53 and Lightsail DNS Zone
If you have your own domain name from another registrar outside of Route53, you can either let Lightsail manage your DNS records for you via Lightsail’s DNS zone, or simply point it to the static IP address you have assigned to your WordPress instance in the previous step. The steps are right here.
I have an existing Route53 public hosted zone, so I will use Route53 to manage the DNS mapping, to avoid having to modify the automatically assigned name servers to my domain name.
Firstly, if you do not have a domain name, you can register one with Route53. A .com or .xyz top-level-domain (TLD) usually costs $12 USD a year. After you have registered a domain name, create a public hosted zone. Once that is done, create a record set and key in the static IP address that you have assigned to your WordPress instance in the previous step.
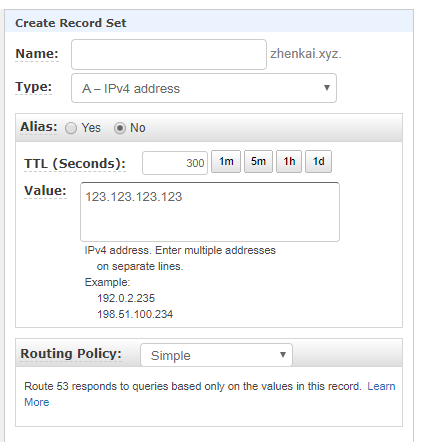
Give Route53 a few minutes to propagate the configuration, and there you have it! A fully functional WordPress with your custom domain name.
The last thing to do before you start tinkering with your WordPress configurations is to secure traffic to your server with SSL/TLS.
SSL/TLS encryption (HTTPS)
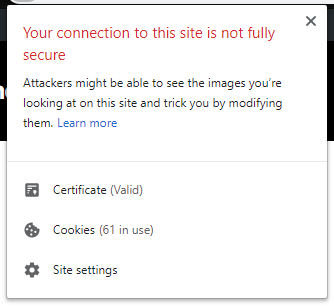
Any website on the Internet without HTTPS will not be fully secure, and can hurt your SEO ranking.
If you are utilizing Amazon CloudFront or an Elastic Load Balancer for your WordPress instance, obtaining a free SSL/TLS certificate from AWS Certificate Manager will be the easiest way to encrypt traffic to your WordPress.
For those not using CloudFront or ELB, luckily, Bitnami has a guide for you to obtain a free Let’s Encrypt SSL/TLS certificate here. Once that is done, you need to configure your Lightsail instance to change your WordPress URL from HTTP to HTTPS with the following steps (credits to markj2324):
- SSH into your WordPress instance via the Lightsail management page
- Run the command:
sudo nano /opt/bitnami/apps/wordpress/htdocs/wp-config.php- Scroll down and look for:

- Replace the http with https, like this:

- After that is done, press
Ctrl+oto save changes andCtrl+xto exit the file. - Restart the apache service with:
sudo /opt/bitnami/ctlscript.sh restart apacheCongratulations! You have finished setting up your own WordPress instance on Amazon Lightsail!
Final Thoughts
Hosting your own WordPress on Amazon Lightsail might not be the most scalable or highly-available solution out-of-the-box, but it is really cheap.
I hope this post have been useful to you. If you have a better way to do this, feel free to reach out to me at tzhenkai@outlook.com.